LuxeritasのプロフィールをJIN風にカスタマイズ
WordPressテーマ「JIN」の、SNSフォローの部分がかわいいなと思ったので、LuxeritasでJIN風カスタマイズをやってみました。
別サイトで行っているカスタマイズなのですが、ジャンル的にこちらのサイトで紹介します。
URLの変更などがあって始めたばかりの方には少し難しいかもしれませんが、基本はコピペでできるので、頑張ってチャレンジしてみてください。
Contents
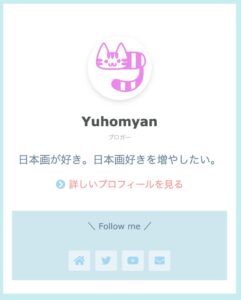
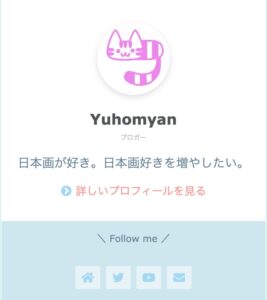
こんな見た目になります。
LuxeritasのプロフィールをJIN風にカスタマイズする手順
- サイドバーウィジェットに「カスタムHTML」を追加
- カスタムHTMLを編集
- 公開
こんな感じでいきます。
サイドバーウィジェットのHTMLの編集で、JIN風のプロフィールウィジェットを作ります。
今回のカスタマイズでは、CSSはHTMLの中に記述しています。
「外観→カスタマイズ」から、任意のウィジェットに「カスタムHTML」を追加します。(今回のカスタマイズでは「汎用サイドバーH3」を使用しています。)
カスタマイズ用HTMLコード
サイドバーウィジェットの「カスタムHTML」に、以下のHTMLコードををコピペします。
URLや色は適宜変えてください。
<div class="sidebar-profile">
<div class="profile-center">
	<div class="img-frame">
<a href="プロフィールページのURL">
		<img src="プロフィール画像のURL" width="100" height="100" class="profileimg" alt="Yuhomyan"/></a>
	</div>
	<br/>
<span class="profile-name">名前</span><br>
	<span class="katagaki">肩書き</span>
	</div>
<p>プロフィール本文</p>
<div class="profile-center more"><i class="fas fa-chevron-circle-right" style="color: #a2d7f3;"></i>  <a href="プロフィールページのURL"> 詳しいプロフィールを見る</a></div>
<div class="profile-sns-menu">
<div class="profile-sns-menu-title ef">\ Follow me /</div>
<ul>
<li class="pro-home"><a href="サイトURL" target="_blank"><i class="fas fa-home"></i></a></li>
<li class="pro-tw"><a href="TwitterURL" target="_blank"><i class="fab fa-twitter"></i></a></li>
<li class="pro-youtube"><a href="YouTubeのURL" target="_blank"><i class="fab fa-youtube"></i></a></li>
<li class="pro-contact"><a href="お問い合わせフォームURL" target="_blank"><i class="fas fa-envelope"></i></a></li>
</ul>

</div></div>

<style>
.sidebar-profile {
   width: 100%;
   font-size: 1.2em;
  padding-top: 30px;
	box-sizing: border-box;
	text-align: center;
}

.profile-center{
   text-align: center;
   margin-bottom: 15px;
}
/*プロフィール画像を丸くする*/
.img-frame {
    width: 100px;
    height: 100px;
    border-radius: 50%;
    margin-left: auto;
    margin-right: auto;
    overflow: hidden;
    box-shadow: rgb(0 0 0 / 20%) 0px 3px 10px -2px;
	transition: color .4s ease,background .4s ease,transform .4s ease,opacity .4s ease,border .4s ease,padding .4s ease,left .4s ease,box-shadow .4s ease;
}

/* ハバー時に画像を大きく */
img.profileimg{
    transition: .3s ease-in;
}
img.profileimg:hover {
    transform: scale(1.2);
}

/*名前*/
.profile-name{
   font-size: 1.2em;
   font-weight: bold;
   color: #505454;/* 文字色 */
}
/* 肩書き */
	.katagaki{
		top: 2em;
    font-size: .75rem;
    font-weight: 500;
    color: rgba(0,0,0,.35);/* 文字色 */
    width: 100%;
    text-align: center;
	}
/*「詳しいプロフィールを見る」まわり*/
.profile-center.more{
   margin: 1em 1em 2em;
	 font-size: .9em;
}
.profile-center p{
		font-size: .9em;
	}

/* SNS */
.profile-sns-menu {
    left: 0;
    bottom: 0;
    display: block;
    width: 100%;
    background: #cde7ee;/* 背景色 */
    padding: 15px 0;
}
.profile-sns-menu .profile-sns-menu-title {
    text-align: center;
    width: 100%;
    font-size: 13px;
    color: #6a859c;/* 文字色 */
    margin-bottom: 5px;
}
.profile-sns-menu ul {
    list-style: none;
    display: flex;
    align-items: center;
    justify-content: center;
    background: 0 0!important;
}
.profile-sns-menu ul li {
    margin-bottom: 0;
    background: 0 0!important;
    margin-left: 0;
    margin-right: 0;
}
.profile-sns-menu ul li a {
    -webkit-transition: color .4s,background .4s,transform .4s,opacity .4s,border .4s,padding .4s,left .4s,box-shadow .4s;
    transition: color .4s,background .4s,transform .4s,opacity .4s,border .4s,padding .4s,left .4s,box-shadow .4s;
    display: block;
    width: 34px;
    height: 32px;
    color: #a2d7f3;
	 font-size: 16px;
    margin: 0 4px;
    padding: 0 8px;
    overflow: hidden;
    text-decoration: none!important;
    border-radius: 2px;
    background: rgba(255,255,255,.5);
}
.profile-sns-menu ul li a:hover {
    -webkit-transform: scale(1.1);
    transform: scale(1.1);
}

</style>
おまけ:プロフィールの余白をなくす方法(ディベロッパーツール使用)
余白をなくすと、より本家に近づきます。
ディベロッパーツールを使うので、少しチャレンジングかもしれません。
コード自体は1行加えるだけなのでシンプルですが、クラス名をディベロッパーツールで調べる必要があります。
以下のコードを、<style>〜</style>の内側に記述します。
/*余白*/
div#custom_html-6(ここの数字がサイトによって異なる) {
    padding: 0 !important;
}
で、この時のクラス名なんですが、サイトによって違うのでディベロッパーツールを使って確認します。
Macなら「option command i」、WindowsならF12を押してディベロッパーツールを起動します。
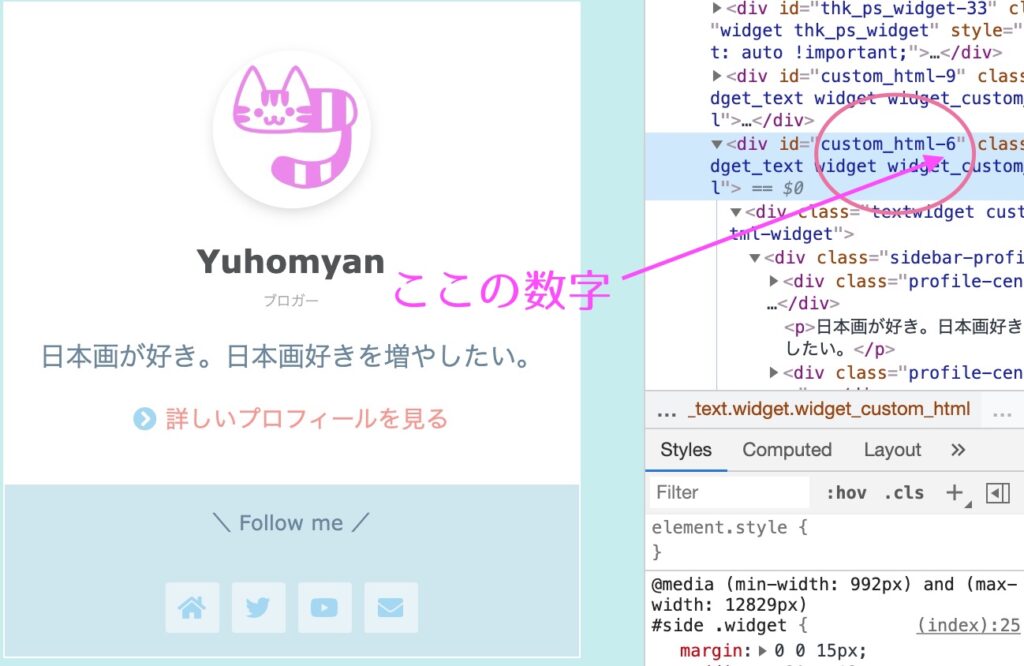
この場合は6なので、クラス名は「div#custom_html-6」と記述します。
ディベロッパーツールをもっと詳しく知りたい、という方は以下の記事を参考にしてください。